Estimated reading time: 11 minutes
Table of contents
Why Hello Kitty Cakes Are a Timeless Favorite
Hello Kitty is a well-known character from Japan that has been loved by many people around the world since 1974. She is special because she doesn’t have a mouth, which makes her look cute and friendly. Cakes decorated with Hello Kitty are very popular for birthdays, parties, and many other celebrations. People love these cakes not just because they are cute, but also because they show a Japanese style called kawaii, which means “cute” in English. This style is all about things that make you feel happy and joyful. Hello Kitty cakes are more than just sweets; they are fun treats that connect people and bring back happy memories. They are not only nice to look at but also taste great, making them a favorite choice for many special occasions.
20 Adorable Hello Kitty Cakes for Every Skill Level
No matter if you are a beginner in baking or have lots of experience, there is a Hello Kitty cake design that fits your skills and dreams. Let’s look at some fun and inspiring ideas, from easy to more complicated:
Fondant Masterpieces: Smooth & Professional Looks
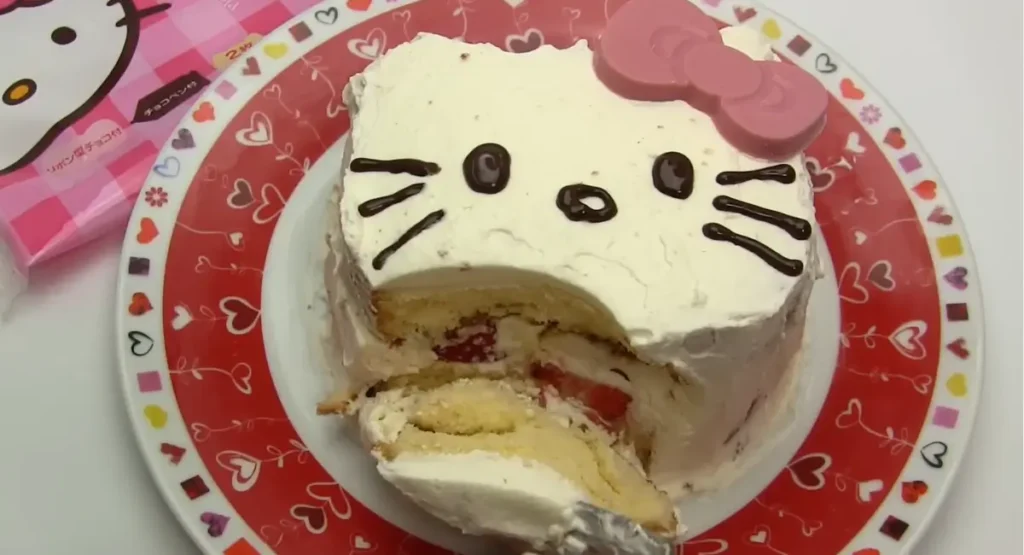
- Classic Hello Kitty Face: A round cake covered in smooth, white fondant creates the perfect canvas. Add a yellow fondant oval for the nose, two black fondant ovals for the eyes, and, most importantly, the signature red (or pink!) fondant bow.
- Hello Kitty with a Dress: Extend the white fondant down to create a simple dress, or add a separate, brightly colored fondant dress for a more elaborate look. Consider polka dots or stripes!
- 3D Hello Kitty Standing Cake: This special method means making the cake look like Hello Kitty standing up. It needs careful cutting and support to hold it up properly.
- Hello Kitty Cupcake Toppers: Create miniature fondant Hello Kitty faces to adorn individual cupcakes. This is a great option for parties and large gatherings.
- Hello Kitty with Flowers: Surround the classic Hello Kitty face with delicate fondant flowers. Roses, daisies, and cherry blossoms are excellent choices.
- Hello Kitty Chef: A fun twist! Add a tiny fondant chef’s hat and apron to your Hello Kitty face cake.
- Hello Kitty Mermaid: Add a tail, and other marine elements.
- Hello Kitty Princess: Give Hello Kitty a fondant crown and a sparkly dress.
Buttercream Bliss: Easy & Delicious Options
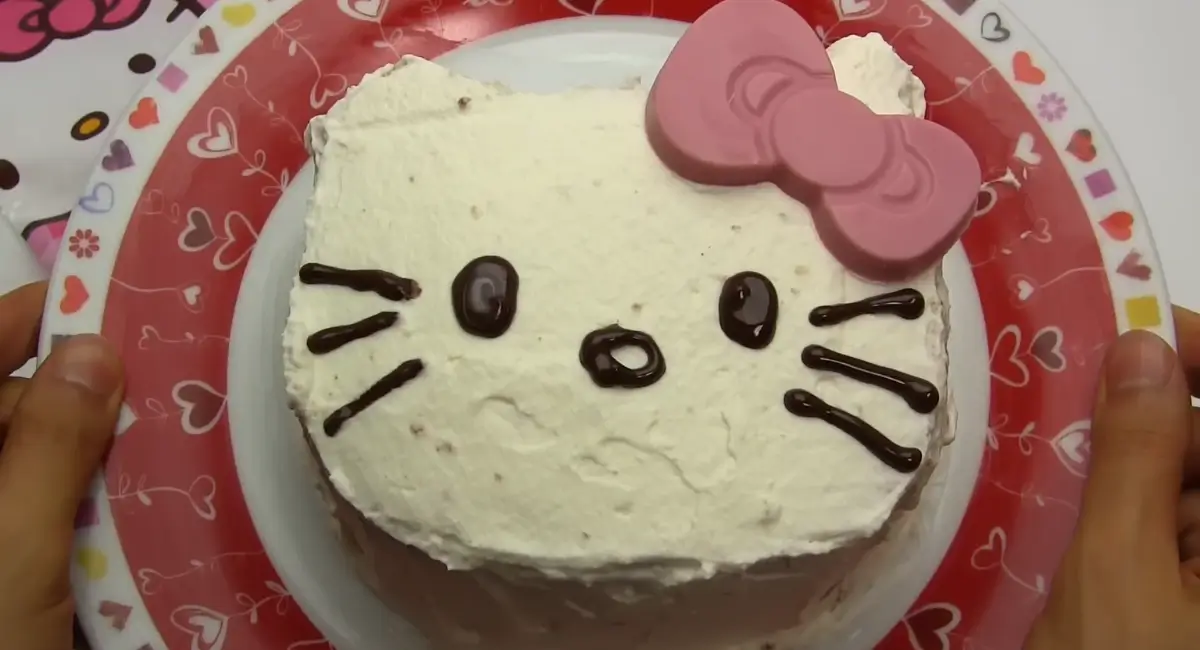
- Piped Hello Kitty Face: Use buttercream frosting to pipe the Hello Kitty face directly onto a round or square cake. A star tip can create a slightly textured look.
- Rosette Hello Kitty Cake: Cover the entire cake in beautiful buttercream rosettes, then add fondant features (eyes, nose, bow) for the Hello Kitty face.
- Hello Kitty with Buttercream Fur: Use a small star tip to create a textured, “furry” effect with buttercream, mimicking Hello Kitty’s fur.
- Rainbow Hello Kitty Cake: Divide your buttercream into several portions and tint each a different pastel color. Use these to create a rainbow effect on the cake, then add the Hello Kitty face.
- Simple Hello Kitty Outline: Frost the cake with a smooth layer of white buttercream, then use a contrasting color (like black or dark pink) to pipe a simple outline of the Hello Kitty face.
- Hello Kitty with a Pink Buttercream Bow: Instead of fondant, create a large, fluffy bow using pink buttercream.
- Hello Kitty and Friends: Add other Sanrio characters like My Melody or Keroppi, piped in buttercream.
- Ombre Hello Kitty Cake: Create a cake with shades of pink or red.
Creative and Unique Hello Kitty Cake Designs
- Hello Kitty Cake Pops: Dip cake balls in white chocolate and decorate them to look like Hello Kitty faces.
- Number Cake with Hello Kitty Theme: Create a large number cake (e.g., for a birthday) and decorate it with Hello Kitty elements.
- Hello Kitty Pull-Apart Cupcake Cake: Arrange cupcakes in the shape of Hello Kitty’s face and frost them together to create a single, large image.
- Hello Kitty Stacked Cake: A two- or three-tiered cake, with each tier featuring a different Hello Kitty design or element.
Step-by-Step Hello Kitty Cake Recipe (With Dietary Adaptations)
This section gives you a complete recipe and decorating tips, including options for different diets. We will make a simple vanilla cake with buttercream frosting, but you can change the base cake to whatever you like, such as chocolate or red velvet.
Part 1: Vanilla Cake Recipe (Makes two 8-inch round layers)
Ingredients:
- 3 cups all-purpose flour (or gluten-free blend – see notes below)
- 2 cups granulated sugar (or sugar substitute – see notes below)
- 1 cup (02 sticks) unsalted butter, softened (or vegan butter – see notes below)
- 4 large eggs (or egg replacer – see notes below)
- 1 cup milk (or plant-based milk – see notes below)
- 2 teaspoons vanilla extract
- 1 tablespoon baking powder
- 1/2 teaspoon salt
Instructions:
- Preheat oven to 350°F (175°C). Grease and flour two 08-inch round cake pans.
- In a large bowl, beat the softened butter and sugar together until it is light and fluffy.
- Add the eggs individually. Mix thoroughly after adding each one before stirring in the vanilla extract.
- In another bowl simply combine the flour baking powder and salt, by whisking them.
- Gradually incorporate the components into the mixture by adding them slowly and alternating with milk in between each addition; begin and finish with the dry elements to ensure proper blending without overmixng them.
- Divide the batter equally among the cake pans that have been prepared for baking.
- “Put it in the oven. Bake for around 30 to 35 mins until a wooden skewer poked into the middle comes out clean.”
- Let the cakes cool in the pans for 10 minutes then carefully flip them onto a wire rack to cool completely.
Part 2: Buttercream Frosting Recipe
Ingredients:
- 1 cup (02 sticks) unsalted butter, softened (or vegan butter – see notes below)
- 4 cups confectioners’ sugar, sifted
- 1/4 cup milk (or plant-based milk – see notes below)
- 1 teaspoon vanilla extract
- Food coloring (gel food coloring is recommended)
Instructions:
- In a large bowl, beat the softened butter until smooth and creamy.
- Add the milk, vanilla extract and beat until the frosting is light and fluffy.
- Divide the frosting into separate bowls and tint with food coloring as desired (white, pink, yellow, black).
Part 3: Fondant (Optional)
- If using fondant, you can purchase pre-made fondant or make your own. There are many excellent recipes available online. Be sure to have:
- White fondant
- Black fondant
- Yellow fondant
- Red or pink fondant (for the bow)
Part 4: Dietary Adaptations
Vegan:
- Replace butter with vegan butter (e.g., Miyoko’s Kitchen, Earth Balance).
- Replace eggs with a commercial egg replacer (e.g., Bob’s Red Mill Egg Replacer) or use 1/4 cup of applesauce or mashed banana per egg.
- Replace milk with plant-based milk (e.g., almond milk, soy milk, oat milk).
Gluten-Free:
Use a high-quality gluten-free all-purpose flour blend (e.g., Bob’s Red Mill 1-to-1 Baking Flour, King Arthur Measure for Measure Flour). Be sure it contains xanthan gum.
Low-Sugar:
Opt for a baking sweetening agent such, as erythritol or stevia or a blend containing monk fruit for your baking needs and adjust the quantity according to your preference as indicated on the packaging instructions; it’s important to note that varying sweeteners can impact the texture and appearance of your treats.
Part 5: Decorating Guide (Classic Hello Kitty Face – Buttercream)
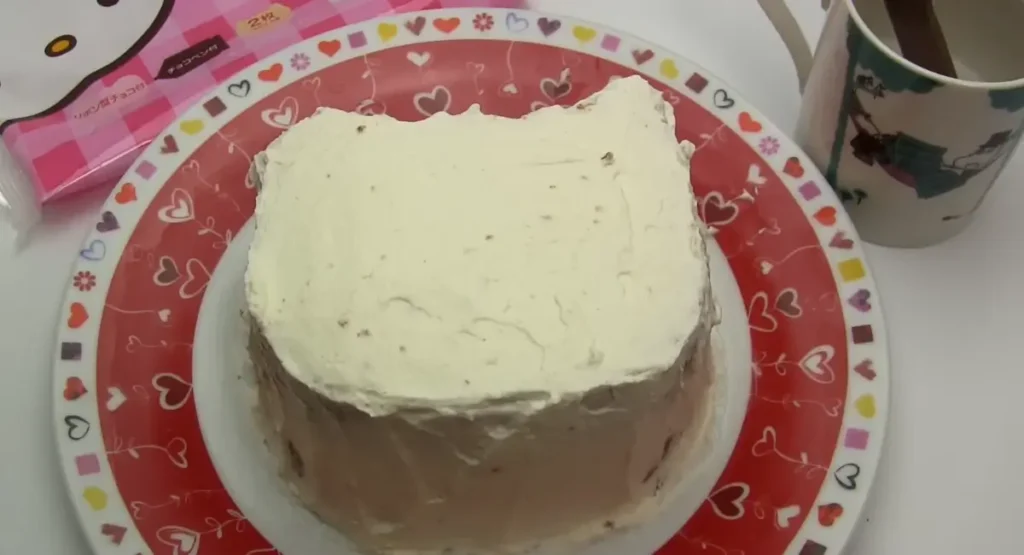
- Level the Cakes: Once the cake layers are completely cool, use a long serrated knife or a cake leveler to trim the tops of the cakes so they are flat and even.
- Frost the Cake: Place a layer of cake on a board, cover it with white buttercream, add the second layer, and frost the entire cake evenly with more buttercream.
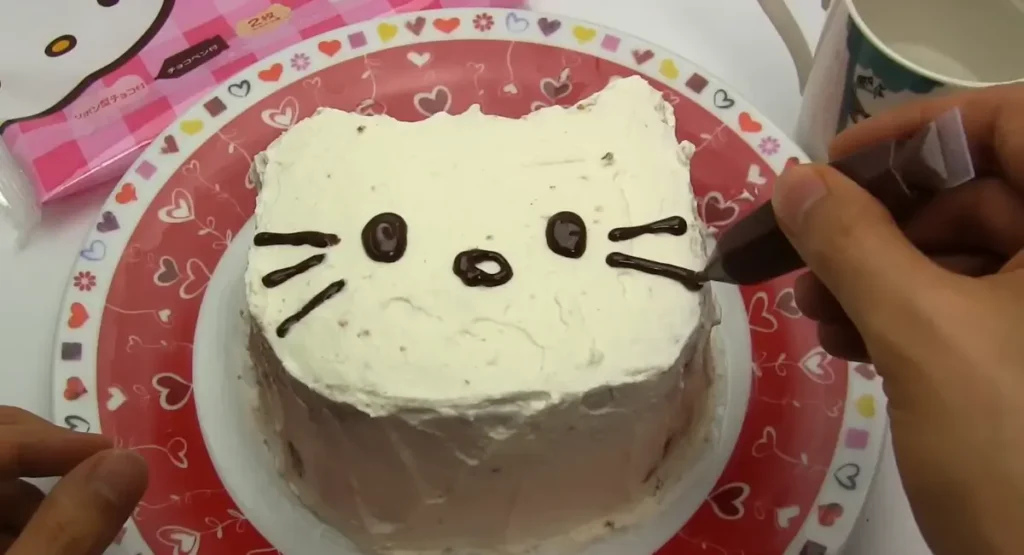
- Pipe the Features:
- Eyes: Use black buttercream and a small round piping tip to pipe two oval-shaped eyes.
- Nose: Use yellow buttercream and a small round piping tip to pipe a small oval-shaped nose.
- Bow: Use pink or red buttercream. You can either pipe a bow directly onto the cake using a leaf tip or a petal tip, or you can create a bow from fondant (see instructions below).
- Whiskers: Using a thin round tip, carefully pipe the whiskers
Part 6: Decorating Guide (Classic Hello Kitty Face – Fondant)
- Level and Frost (Crumb Coat): Level the cake layers as described above. Apply a thin “crumb coat” of buttercream to the entire cake. This helps the fondant adhere and creates a smooth surface.
- Roll out the White Fondant: Knead the white fondant until it is pliable. Roll it out on a surface lightly dusted with confectioners’ sugar or cornstarch to prevent sticking. Roll it out to about 1/8 inch thickness.
- Cover the Cake: Gently pick up the flattened fondant. Place it onto the cake using both your hands and a fondant smoother to make it even and get rid of any air bubbles or creases. Cut off any hanging, off the bottom of the cake.
- Create the Features:
- Eyes: Roll out small pieces of black fondant into ovals. Attach them to the cake using a small amount of edible glue or water.
- Nose: Roll out a small piece of yellow fondant into an oval. Attach it to the cake.
- Bow: Roll out red or pink fondant. Cut out two teardrop shapes for the loops of the bow and a small rectangle for the knot. Assemble the bow and attach it to the cake. You can use a template to help you get the shape right.
Part 7: Tools and Materials
- Cake molds (8-inch round)
- Edible ink pens (black)
- Silicone molds (for fondant decorations, optional)
- Cake board
- Offset spatula
- Piping bags and tips (round, star, leaf/petal)
- Fondant smoother
- Rolling pin
- Turntable
Pro Tips for Baking, Decorating & Storing
- Baking: For results, in baking your cake use ingredients that’re at room temperature to mix them effectively and achieve a smooth batter and a tender cake texture Be cautious not to overmix the batter to prevent a denser cake consistency.
- Decorating: Practice your piping techniques on a piece of parchment paper before decorating the cake. If using fondant, work quickly to prevent it from drying out. Use a small amount of shortening on your hands to prevent the fondant from sticking. Consider using edible glitter or airbrushing to add extra sparkle and dimension to your Hello Kitty cake. Downloadable Hello Kitty templates (SVG files or PDFs) can be incredibly helpful for creating precise shapes, especially for the bow and facial features.
- Storing: To keep buttercream cakes fresh, store them in the refrigerator inside a container that closes tightly. They usually stay good for 3 to 4 days. Fondant cakes should be stored in a tightly closed container at room temperature, away from direct sunlight and heat. They usually last for 2 to 3 days, but the fondant might feel a little different after that. If you want to keep a cake for a longer time, you can freeze it. Just make sure to wrap it well, and it can last for 2 to 3 months.
FAQs: Answering Your Hello Kitty Cake Questions
How do I make the Hello Kitty bow look perfect?
Using a template is highly recommended, whether you’re working with fondant or buttercream. You can find free printable templates online. For fondant, cut out the shapes and assemble them carefully. For buttercream, practice piping the bow shape on parchment paper first.
How far in advance can I make a Hello Kitty cake?
You can bake the cake parts 1 to 2 days before your event. Just wrap them well and keep them at room temperature or in the fridge. also, You can make the buttercream frosting in advance and put it in the fridge. However, it’s better to decorate the cake closer to the event for the best look and taste.
Where can I find Hello Kitty cake decorations, like toppers or edible images?
Check online retailers like Amazon, Etsy, or specialized baking supply stores. You may also find Hello Kitty-themed decorations at party supply stores or even some supermarkets.
I want to make a “Hello Kitty cake for adults.” Any suggestions?
Yes, try creating a more sophisticated design, possibly use darker more appealing colors.
Hello Kitty Cake Pairings
To make a fun and enjoyable Hello Kitty party, think about adding special drinks and snacks to go with your cake. A tasty matcha latte, which is a green tea drink, is a nice choice. Its green color and light sweetness go well with the rich flavor of the cake. Classic Japanese treats like Sakuma Drops (fruit-flavored hard candies) add a touch of authentic kawaii charm and a playful element to the presentation. Other options include:
- Strawberry Milk: A classic pairing that complements the pink and red often associated with Hello Kitty.
- Pocky: These chocolate-covered biscuit sticks are another popular Japanese snack.
- Ramune: A Japanese fizzy drink that comes in a special bottle with a marble inside to keep it sealed.
Who Should Skip This Recipe?
- Those with Severe Allergies: While we offer adaptations, this recipe uses common allergens (wheat, dairy, eggs). If you have severe allergies, consult a specialized allergy-friendly recipe.
- Absolute Beginners with No Baking Experience: While we aim for clarity, this recipe involves multiple steps. If you’ve never baked before, start with a simpler cake recipe first.
- Those Who Don’t Like Vanilla Cake: The provided recipe is for vanilla, so those who don’t like it should replace it.

