Did you know that properly frozen corn on the cob can retain up to 90% of its original nutritional value for up to 12 months? Many home cooks believe fresh corn loses its sweetness and texture when frozen, but this couldn’t be further from the truth. Learning how to freeze corn on the cob correctly allows you to enjoy summer’s golden harvest throughout the entire year, saving money while preserving that crisp, sweet flavor we all crave.
Whether you’re dealing with a bumper crop from your garden or taking advantage of seasonal sales at the farmer’s market, mastering corn preservation techniques ensures you’ll never waste this versatile vegetable again. The key lies in understanding the proper blanching process and storage methods that lock in freshness.
Check out our salsa recipe with fresh tomatoes — perfect for pairing with fresh corn dishes.
Print
How to Freeze Corn on the Cob: Step-by-Step Guide to Keep It Fresh All Year
- Total Time: 15 minutes
- Yield: 12 ears of corn
Description
Learn how to freeze corn on the cob the easy way! This step-by-step guide helps you preserve sweet corn’s flavor and texture, with or without blanching. Perfect for meal prep, saving garden harvests, or enjoying fresh corn all year round.
Ingredients
- 12 fresh corn on the cobs (shucked or unshucked)
- Large pot of boiling water (for blanching)
- Bowl of ice water (for shocking)
- Ziplock freezer bags or vacuum-seal bags
- Sharp knife (if cutting kernels off)
- Paper towels for drying
Instructions
- Shuck the Corn: Remove husks and silks from each cob. Wash thoroughly to remove any debris.
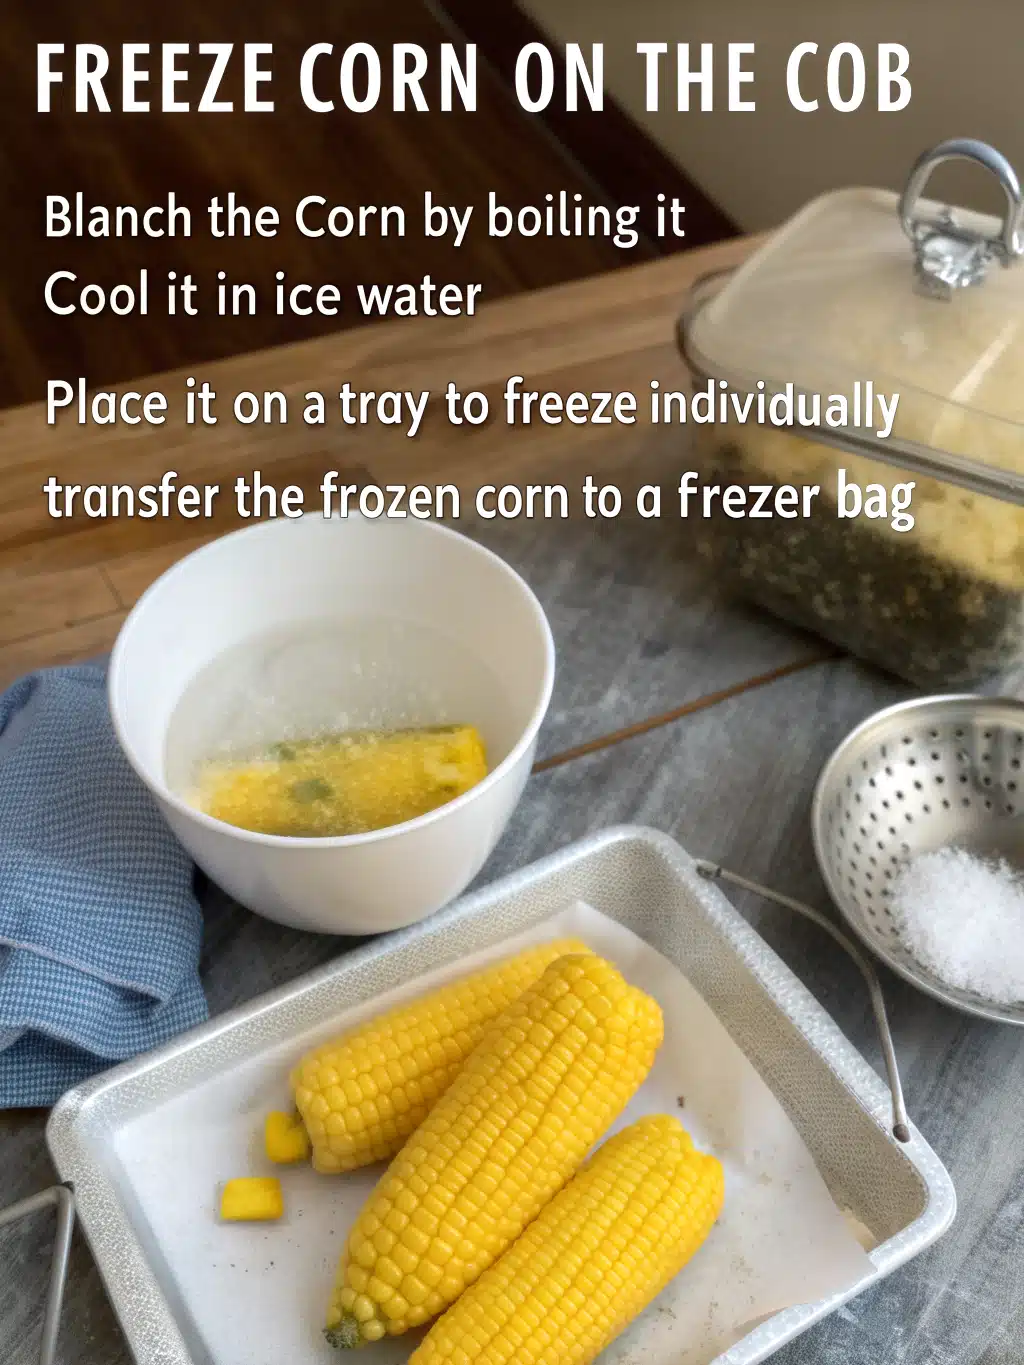
- Blanch (Optional but Recommended): Bring a large pot of water to a boil. Add corn cobs and boil for 3–5 minutes. Immediately transfer to an ice water bath for 3–5 minutes.
- Dry Completely: Pat each cob dry with paper towels to avoid ice crystals forming in the freezer.
- Bag It: Place cobs or cut kernels into freezer-safe ziplock or vacuum bags. Press out air or use a sealer. Label bags with the date.
- Freeze Flat: Lay bags flat in a single layer in the freezer. Once frozen solid, you can stack them to save space.
Notes
Blanching is key for long-term storage as it helps maintain corn’s sweetness and texture. If skipping blanching, consume within 1–2 months. To save space, cut kernels off the cob before freezing. Always label your bags for freshness tracking.
- Prep Time: 10 minutes
- Cook Time: 5 minutes
- Category: Preservation
- Method: Freezing
- Cuisine: American
Ingredients List
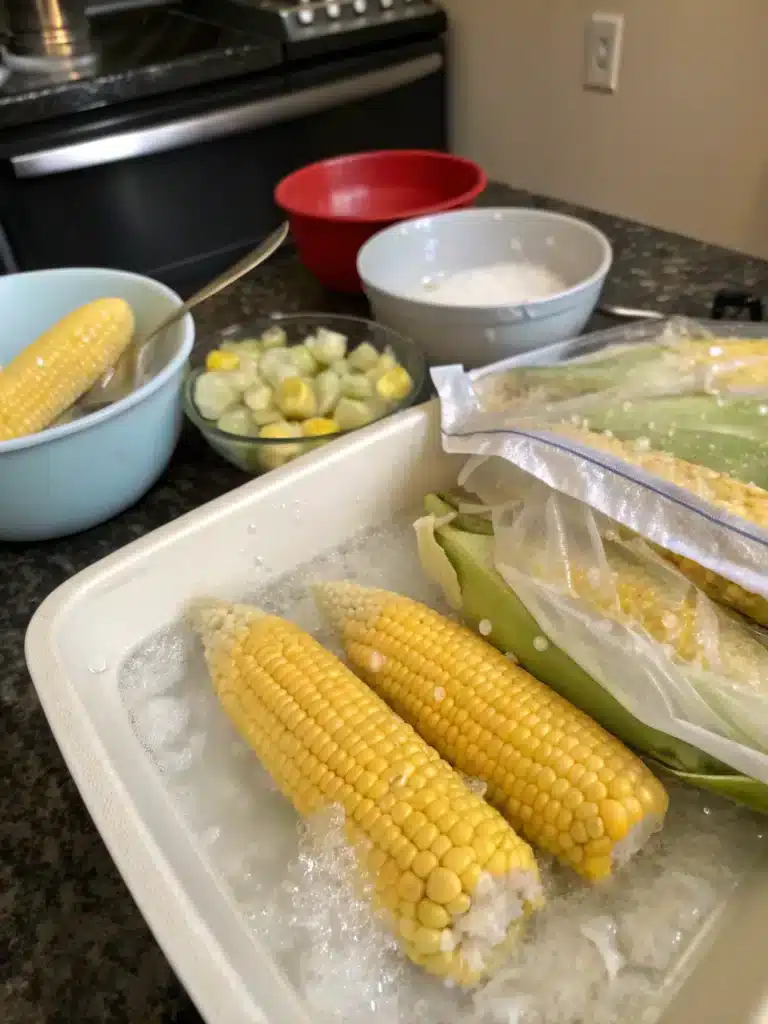
The beauty of freezing corn on the cob lies in its simplicity. You’ll need minimal ingredients and equipment to preserve this summer staple effectively.
- Fresh corn on the cob – 6-8 ears (choose ears with bright green husks and plump, milky kernels)
- Water – Large pot filled 2/3 full (approximately 4-6 quarts)
- Ice water bath – Equal amount to boiling water (4-6 quarts cold water plus 2-3 trays of ice cubes)
- Salt – 1 tablespoon (optional, for enhanced flavor during blanching)
Equipment needed: Large stockpot, slotted spoon or tongs, sharp knife, cutting board, freezer-safe bags or vacuum-sealed bags, and permanent marker for labeling.
Substitution tips: If you don’t have a large enough pot, work in smaller batches. Frozen corn kernels can substitute whole cobs if storage space is limited.
Timing
Understanding the time investment helps you plan this preservation project efficiently. The process requires active attention but isn’t overly time-consuming.
Preparation time: 15-20 minutes (husking and cleaning corn, setting up ice bath)
Blanching time: 4-6 minutes per batch (depending on corn size)
Cooling time: 4-6 minutes per batch in ice water
Total active time: 45-60 minutes for 6-8 ears
This timing represents approximately 30% less effort than canning corn, while providing superior texture retention compared to other preservation methods.
Step-by-Step Instructions
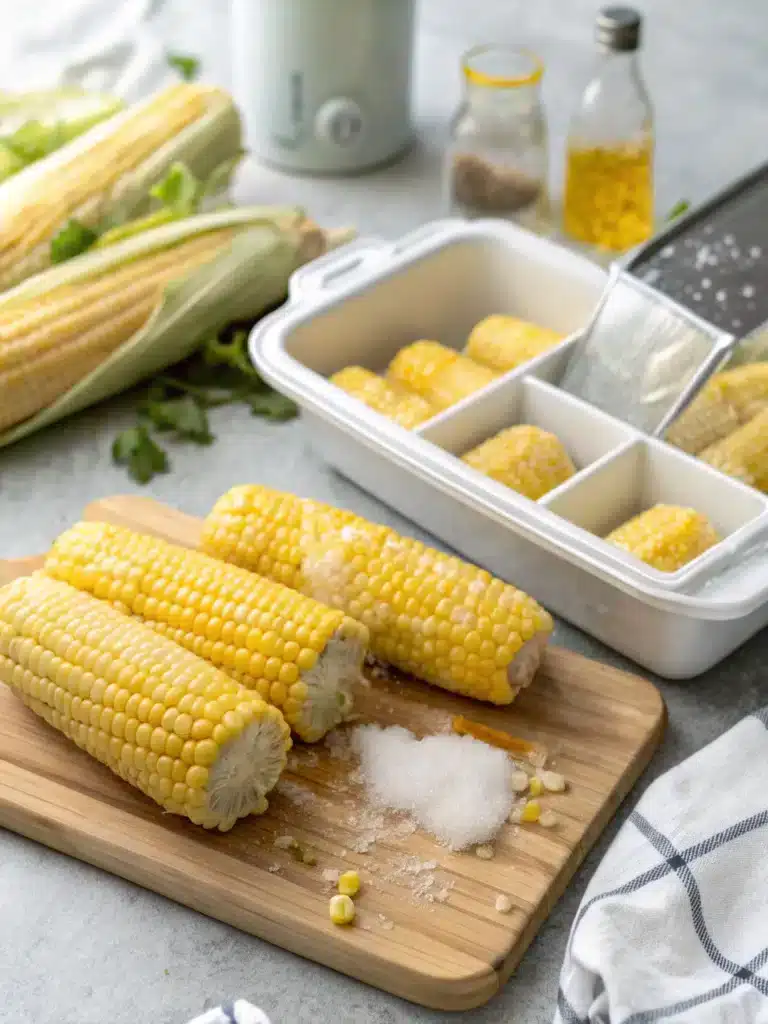
Step 1: Prepare Your Corn
Remove husks and silk from each ear of corn completely. Rinse under cold running water to eliminate any remaining silk strands. Trim stem ends if necessary, but keep cobs whole for optimal texture preservation.
Step 2: Set Up Your Blanching Station
Fill your largest pot 2/3 full with water and bring to a rolling boil over high heat. Simultaneously, prepare an ice water bath in a large bowl or second pot. The ice water should be as cold as possible to halt the cooking process immediately.
Step 3: Blanch the Corn
Carefully lower 3-4 ears of corn into the boiling water using tongs. Start your timer immediately – small ears need 4 minutes, medium ears require 5 minutes, and large ears need 6 minutes. Maintain a rolling boil throughout the process.
Step 4: Shock in Ice Water
Using tongs, quickly transfer the blanched corn directly into the ice water bath. This “shocking” process stops the cooking immediately and preserves the corn’s crisp texture. Leave corn in ice water for the same amount of time it was blanched.
Step 5: Drain and Dry
Remove corn from ice water and pat completely dry with clean kitchen towels. Excess moisture can cause freezer burn and ice crystal formation, which degrades quality over time.
Step 6: Package for Freezing
Place each ear in individual freezer bags, removing as much air as possible before sealing. Alternatively, wrap each ear in plastic wrap, then place multiple ears in larger freezer bags. Label with contents and date using a permanent marker.
Step 7: Freeze Immediately
Place packaged corn in the freezer immediately, laying bags flat initially for faster freezing. Once frozen solid (about 24 hours), you can rearrange for optimal storage space utilization.
Nutritional Information
Frozen corn on the cob retains impressive nutritional value when properly processed. One medium ear (approximately 90 grams) provides essential nutrients that support overall health.
Per ear nutritional breakdown: 80-90 calories, 19 grams carbohydrates, 3 grams protein, 1 gram fat, and 3 grams dietary fiber. Corn also delivers significant amounts of vitamin C (10% daily value), thiamine (15% daily value), and folate (8% daily value).
The blanching process preserves approximately 85-90% of water-soluble vitamins, making frozen corn nearly as nutritious as fresh. Studies show that properly frozen corn maintains its antioxidant properties, including lutein and zeaxanthin, which support eye health.
Corn provides complex carbohydrates for sustained energy and contains resistant starch when cooled, which acts as a prebiotic to support digestive health.
Learn more about air fryer frozen salmon — another frozen food done right.
Healthier Alternatives for the Recipe
While how to freeze corn on the cob is naturally healthy, several modifications can enhance its nutritional profile or accommodate dietary restrictions.
Low-sodium option: Skip adding salt to the blanching water entirely. The corn’s natural sweetness shines through without additional sodium.
Organic choice: Select organic corn to avoid pesticide residues and potential GMO concerns. Organic corn often has superior flavor intensity.
Portion control: Pre-cut corn into smaller sections before freezing to encourage appropriate serving sizes and faster cooking times.
Kernel-only option: Remove kernels before freezing for lower carbohydrate content per serving and easier portion control for those managing blood sugar levels.
Serving Suggestions
Frozen corn on the cob offers incredible versatility in meal planning throughout the year. These serving ideas help you maximize your preserved harvest.
Quick weeknight sides: Steam frozen corn directly from the freezer for 8-10 minutes. Add butter, herbs, or spices for instant flavor enhancement.
Grilling option: Thaw corn completely, then grill for authentic summer flavors any time of year. Brush with herb butter or sprinkle with chili powder and lime.
Soup ingredient: Cut thawed corn into rounds and add to chowders, vegetable soups, or Mexican-inspired dishes for hearty texture and natural sweetness.
Holiday presentations: Serve alongside traditional winter meals to add color and remind everyone of summer’s abundance.
Common Mistakes to Avoid
Avoiding these frequent errors ensures your frozen corn maintains restaurant-quality taste and texture throughout storage.
- Skipping the blanching step: Raw corn becomes mushy and loses sweetness during freezing. Blanching preserves cellular structure and locks in flavor.
- Over-blanching: Excessive cooking time creates mushy corn that won’t improve after freezing. Stick to recommended timing strictly.
- Inadequate cooling: Rushing the ice water bath allows residual heat to continue cooking, resulting in overcooked texture.
- Poor packaging: Air exposure causes freezer burn and off-flavors. Remove all air from packaging before sealing.
- Freezing old corn: Starting with past-prime corn won’t improve during freezing. Choose the freshest ears possible for best results.
Storing Tips for the Recipe
Proper storage techniques extend your corn’s freezer life and maintain peak quality for maximum enjoyment.
Temperature consistency: Store corn at 0°F (-18°C) or below. Temperature fluctuations degrade texture and can cause ice crystal formation.
Storage duration: 3 Simple Ways to Freeze Fresh Corn can maintain quality for 10-12 months when properly packaged, though best flavor occurs within 6-8 months.
Organization system: Use clear labels with freezing dates and arrange packages with oldest corn in front for proper rotation.
Thawing recommendations: For best texture, cook corn directly from frozen or thaw slowly in the refrigerator overnight. Avoid room temperature thawing, which encourages bacterial growth.
Refreezing guidelines: Never refreeze previously thawed corn, as this significantly degrades quality and food safety.
What is the best way to freeze corn on the cob?
The best way to freeze corn on the cob is by first blanching it. Start by removing the husks and silks, then boil the corn for about 3–4 minutes. Immediately transfer it to an ice bath to stop the cooking process. Once cool, dry the cobs and pack them into airtight freezer-safe ziplock bags or vacuum-sealed bags. This method preserves the flavor, color, and texture while reducing the risk of freezer burn.
Do you have to boil fresh corn on the cob before freezing it?
Boiling, or blanching, is highly recommended before freezing corn on the cob. It helps preserve the corn’s color, texture, and taste by deactivating enzymes that cause spoilage. Without blanching, the corn may turn mushy or lose flavor over time. However, you can still freeze raw corn, but it should be used within 1–2 months for best quality.
Can you freeze corn in ziplock bags?
Yes, you can freeze corn in ziplock bags. After blanching and cooling the corn, pat it dry thoroughly and place each cob (or kernels, if cut off the cob) into a freezer-safe ziplock bag. Squeeze out as much air as possible to prevent freezer burn. For added protection, you can double-bag or use vacuum-seal bags. Label each bag with the freezing date.
How long will unshucked corn last in the freezer?
Unshucked corn can last up to 6–8 months in the freezer when stored properly. However, freezing corn with the husks on is less effective at preventing freezer burn compared to husked and blanched corn. For better preservation, it’s best to husk, blanch, and store the corn before freezing.
Conclusion
Mastering how to freeze corn on the cob transforms seasonal abundance into year-round enjoyment. This simple preservation method maintains 90% of corn’s nutritional value while delivering the sweet, crisp texture that makes corn irresistible.
The blanching technique outlined here ensures professional-quality results that rival store-bought frozen corn at a fraction of the cost. By following these detailed steps, you’ll preserve summer’s harvest efficiently while avoiding common mistakes that compromise quality.
Ready to start preserving your corn harvest? Gather your supplies and begin with a small batch to perfect your technique. Share your frozen corn success stories in the comments below, and don’t forget to explore our other seasonal preservation guides to maximize your garden’s potential throughout the year. Your future self will thank you when you’re enjoying sweet, garden-fresh corn in the depths of winter!
Don’t miss our guide to homemade deli meat — learn more about freezing and preserving protein.
Did You Make This Recipe!
There are no reviews yet. Be the first one to write one.

