Estimated reading time: 10 minutes
The patterns of dark and light in a loaf of marble rye bread are really beautiful. They make the bread look special, and this mixing of colors shows that it has a rich flavor. It’s not just sweet; it also has a tasty and rich saltiness. I remember the first time I saw a loaf – I was a kid, peering into the glass case at my local Jewish deli, completely mesmerized. It looked like a work of art, and the aroma? Pure heaven. And honestly, that first bite of a Reuben, with the tangy sauerkraut and melted Swiss? That’s a core memory!
But marble rye is more than just a pretty face (or, well, loaf). It’s a bread with a rich history, a unique baking process, and a surprising number of culinary uses. In this comprehensive guide, we’ll delve into everything you need to know about marble rye bread. We will look at where this bread comes from and how it is different from regular rye bread. I will share a complete recipe with easy step-by-step pictures. We will also talk about the health benefits of this bread and share some fun ways to use it besides making a Reuben sandwich. So, whether you are an experienced baker or just beginning to make bread, get ready to discover the secrets of this tasty and famous bread!
Table of contents
The History of Marble Rye: From Eastern Europe to American Delis
To truly understand marble rye, we need to take a trip back in time – and across the Atlantic – to Eastern Europe. Rye bread, in its various forms, has been a staple in countries like Germany, Russia, Poland, and the Baltic states for centuries. The cool weather and good soil in these places were perfect for growing rye. Rye is a strong grain that can survive cold winters, unlike wheat, which has a harder time.
In Eastern Europe, rye bread became very important for Jewish communities. It was cheap and easy to get, helping people get through long winters and difficult times. Different areas made their own special types of rye bread. They added things like caraway seeds or molasses to make the bread taste better. This bread was not just food; it was very important for meals and a sign of strength and unity for the community.
When Jewish immigrants began arriving in the United States in the late 19th and early 20th centuries, they brought their cherished rye Bread Recipes with them. These recipes became the foundation for the rye bread we know and love in American delis today. Somewhere along the line, likely in the bustling kitchens of these delis, the concept of marble rye was born. This is considered to be a neat way of making two different rye doughs – one light and the other dark (cocoa powder or molasses being used for the dark one) to make a very pretty and tasty loaf. It wasn’t just a question of aesthetics; it brought a certain subtlety to the flavour palette. It soon became a signature item, most notably when paired with pastrami or corned beef in the famous Reuben sandwich.
Marble Rye vs. Traditional Rye: Key Differences
Marble rye and traditional rye are both descendants of the same original bread, but they have distinct differences:
| Feature | Traditional Rye Bread | Marble Rye Bread |
| Ingredients | Rye flour, water, salt, yeast (sometimes sourdough starter), often caraway seeds | Light rye dough (rye flour, water, salt, yeast), dark rye dough (rye flour, water, salt, yeast, cocoa powder/molasses) |
| Flavor | Earthy, slightly sour, often with caraway notes | Similar to traditional rye, but with a subtle sweetness and chocolate/molasses notes in the dark swirls |
| Texture | Can be dense and chewy, or lighter depending on the recipe | Similar to traditional rye, but the contrast between the light and dark doughs can create a slightly varied texture |
| Appearance | Typically a uniform brown color | Distinctive swirling pattern of light and dark brown |
| Uses | Sandwiches, toast, accompaniment to soups/stews | Primarily sandwiches (especially Reubens), but also versatile for other uses (see below) |
The main difference is that marble rye is made using two separate types of dough. The light rye dough is essentially a traditional rye, while the dark rye dough gets its color and subtle sweetness from the addition of cocoa powder or molasses (or sometimes both!). The swirling technique (which we’ll cover in detail in the recipe) is what gives marble rye its signature look. The flavour is more complex then traditional rye, but never overwhelming.
How to Bake Perfect Marble Rye Bread (With Recipe)
Here is the fun in baking a loaf of marble rye for you now. The final result may seem a bit complicated during the initial read but trust me when I say it will be worthwhile. I’ve tried to simplify it into understandable steps and the wait will be rewarded with both stunning and delicious results.
Ingredients and Tools You’ll Need
Light Rye Dough:
- 3 cups (360g) bread flour
- 1 cup (120g) rye flour
- 1 ½ cups (360ml) warm water (105-115°F / 40-46°C)
- 2 ¼ teaspoons (7g) active dry yeast (one packet)
- 1 ½ teaspoons (9g) salt
- 1 tablespoon caraway seeds (optional, but highly recommended!)
Dark Rye Dough:
- 2 ½ cups (300g) bread flour
- 1 ½ cups (180g) rye flour
- 1 ½ cups (360ml) warm water (105-115°F / 40-46°C)
- 2 ¼ teaspoons (7g) active dry yeast (one packet)
- 1 ½ teaspoons (9g) salt
- 2 tablespoons unsweetened cocoa powder
- 2 tablespoons molasses
- 1 tablespoon caraway seeds (optional)
Tools:
- Two large mixing bowls
- Stand mixer (optional, but helpful)
- Dough scraper
- Clean kitchen towel
- Baking sheet
- Parchment paper
- Sharp knife or bread lame
- Spray bottle with water
Step-by-Step Dough Swirling Technique
Total Time: 1 hour and 5 minutes
u003cstrongu003eLight Dough:u003c/strongu003e
Combine light dough ingredients (bread flour, rye flour, warm water, yeast, salt, optional caraway) in a large bowl. Knead with a stand mixer (8-10 min) or by hand (10-12 min) until smooth and elastic.
u003cstrongu003eDark Dough:u003c/strongu003e
Repeat the process with the dark dough ingredients (including cocoa powder and molasses). Knead until smooth and elastic.u003cimg class=u0022wp-image-3184u0022 alt=u0022 Loaf of marble rye bread, partially sliced, on a cutting board with butter, showcasing the swirl pattern.u0022 src=u0022https://bittyrecipes.com/wp-content/uploads/2025/02/marble-rye-bread-1.webpu0022 style=u0022max-width:100%;u0022/u003e
u003cstrongu003eFirst Rise:u003c/strongu003e
Put each ball of dough in a bowl that has a little oil and cover it. Let it sit in a warm spot for 1 to 1.5 hours, or until it gets twice as big.
u003cstrongu003eDivide u0026amp; Shape:u003c/strongu003e
Punch down both doughs. Divide each into two equal pieces (four pieces total).
u003cstrongu003eCreate Swirls:u003c/strongu003e
Roll out one light and one dark piece into 12×8 inch rectangles. Place dark dough on top of light dough. Roll tightly from the short end, like a jelly roll. Repeat with the remaining dough pieces.u003cimg class=u0022wp-image-3185u0022 alt=u0022 Sliced marble rye bread loaf on cutting board and the ingredients used on the sideu0022 src=u0022https://bittyrecipes.com/wp-content/uploads/2025/02/marble-rye-bread-.webpu0022 style=u0022max-width:100%;u0022/u003e
u003cstrongu003eCombine u0026amp; Twist:u003c/strongu003e
Place the two swirled logs side-by-side. Press them together gently. Twist the logs together, fold in half, and pinch the ends to form a loaf.
u003cstrongu003eSecond Rise:u003c/strongu003e
Place the shaped bread on a baking sheet lined with parchment paper. Loosely cover it with either a cloth or plastic wrap. Allow it to proof for 45 to 60 minutes, and it should be nearly double in size.
u003cstrongu003ePreheat u0026amp; Score:u003c/strongu003e
Preheat oven to 400°F (200°C) with a baking stone or empty cast-iron skillet inside. Make a few shallow cuts on the top of the loaf using a sharp knife.
u003cstrongu003eBake:u003c/strongu003e
Place the baking sheet in the oven, Spritz the loaf with water. Bake for 35-45 minutes, until golden brown and hollow-sounding when tapped.
u003cstrongu003eCool:u003c/strongu003e
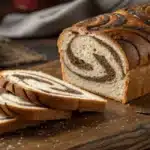
Allow the item to cool completely on a wire rack before slicing.u003cimg class=u0022wp-image-3186u0022 alt=u0022A loaf of marble rye bread, sliced, on a dark wooden cutting board, emphasizing the swirl and texture.u0022 src=u0022https://bittyrecipes.com/wp-content/uploads/2025/02/marble-rye-bread-1-1.webpu0022 style=u0022max-width:100%;u0022/u003e
Health Benefits of Marble Rye Bread
Beyond its delicious flavor and satisfying texture, marble rye bread offers some nutritional benefits, primarily due to its rye flour content.
- High in Fiber: Rye flour is a good source of dietary fiber, which is very important for our digestive system. Fiber has a role in controlling blood sugar, a sense of fullness, and more often than not, helps in lowering cholesterol. Marble rye (and rye bread in general) has a significantly higher fiber content than white bread.
- Rich in Nutrients: Rye flour contains various vitamins and minerals, including magnesium, phosphorus, zinc, and B vitamins.
- Lower Glycemic Index: Village bread has lower GI than white bread; it does not cause as rapid increase in blood sugar and remains stable for longer periods. It is quite helpful for diabetics and those who are willing to control their blood sugar.
- Source of Complex Carbohydrates: While it might sound counter-intuitive, complex carbohydrates, particularly those from whole grains, are a healthy and vital source of energy for your body.
10 Creative Ways to Use Marble Rye (Beyond Sandwiches)
While the Reuben sandwich is undoubtedly the most iconic use for marble rye, its versatility extends far beyond that classic. Here are some creative ideas to inspire you:
- Reuben Variations: Experiment with different fillings for your Reuben – try turkey, pastrami, or even a vegetarian version with roasted vegetables.
- Gourmet Grilled Cheese: The slight sweetness of marble rye pairs beautifully with sharp cheddar, Gruyère, or even a funky blue cheese.
- French Toast: Yes, you can make French toast with marble rye! The bread’s texture holds up well to soaking, and the flavor adds a unique twist.
- Croutons: Cube leftover marble rye and bake or pan-fry it until crispy for delicious croutons to top salads or soups.
- Breadcrumbs: Grind dried marble rye into breadcrumbs for coating chicken, fish, or vegetables.
- Stuffing: Use marble rye as the base for your holiday stuffing – its flavor complements traditional stuffing ingredients perfectly.
- Appetizers: Cut marble rye into small squares or triangles and top with cream cheese, smoked salmon, or other savory toppings for elegant appetizers.
- Bread Pudding: Marble rye adds a unique depth of flavor to bread pudding.
- Panzanella Salad: This Italian bread salad is traditionally made with day-old bread, and marble rye works beautifully.
- Bruschetta: Toast slices of marble rye and top with your favorite bruschetta toppings.
FAQ Section
u003cstrongu003eIs marble rye bread gluten-free?u003c/strongu003e
No, marble rye bread is made with rye flour, which contains gluten. However, some bakeries may offer gluten-free versions using alternative flours.
u003cstrongu003eCan I freeze marble rye bread?u003c/strongu003e
Yes, you can freeze marble rye bread. First, wrap it well in plastic wrap. Then, put it in a freezer bag. It will stay good for about 3 months. To use it, let it thaw at room temperature or in the fridge.
u003cstrongu003eWhat’s the difference between marble rye and pumpernickel?u003c/strongu003e
Pumpernickel is a type of dark rye bread that is typically made with coarsely ground rye flour and often includes molasses or other sweeteners. It has a darker color and a denser, chewier texture than marble rye. Marble Rye only uses two colours of dough.
u003cstrongu003eCan I make marble rye bread without a stand mixer?u003c/strongu003e
Yes, you can mix and press the dough with your hands. It will take a little more time and effort, but the outcome will still be just as good.
u003cstrongu003eCan I make a vegan version of marble rye bread?u003c/strongu003e
Yes, the recipe above is naturally vegan, as long as you don’t add any dairy-based ingredients as optional extras. The cocoa and molasses are plant-based.
u003cstrongu003eWhat’s the Best Way to store Marble Rye?u003c/strongu003e
Store your cooled loaf in an airtight container, bread box or tightly wrapped in plastic at room temperature. It is best eaten in three to four days.
Conclusion
Marble rye bread is a special kind of bread made from simple ingredients and traditional methods. It started in Eastern Europe and became very popular in American delis. This bread has a lot of history. Whether you decide to bake your own loaf or enjoy a tasty Reuben sandwich, I hope this guide helps you appreciate marble rye bread even more. So, go ahead and bake (or buy!) some marble rye – your taste buds will love it! And please share your baking stories and experiences in the comments below!
Related Recipes You Might Enjoy
Did You Make This Recipe!
There are no reviews yet. Be the first one to write one.
How to Make Marble Rye Bread at Home: Full Guide
- Total Time: 1 hour 5 minutes
- Yield: 1 loaf
Description
Uncover the history and baking process behind marble rye bread and why it makes the perfect base for a Reuben sandwich.
Ingredients
- Light Rye Dough:
- 3 cups 360g bread flour
- 1 cup 120g rye flour
- 1 ½ cups 360ml warm water (105-115°F / 40-46°C)
- 2 ¼ teaspoons 7g active dry yeast (one packet)
- 1 ½ teaspoons 9g salt
- 1 tablespoon caraway seeds (optional, but highly recommended!)
- Dark Rye Dough:
- 2 ½ cups 300g bread flour
- 1 ½ cups 180g rye flour
- 1 ½ cups 360ml warm water (105-115°F / 40-46°C)
- 2 ¼ teaspoons 7g active dry yeast (one packet)
- 1 ½ teaspoons 9g salt
- 2 tablespoons unsweetened cocoa powder
- 2 tablespoons molasses
- 1 tablespoon caraway seeds (optional)
Instructions
- Light Dough: Combine light dough ingredients (bread flour, rye flour, warm water, yeast, salt, optional caraway) in a large bowl. Knead with a stand mixer (8-10 min) or by hand (10-12 min) until smooth and elastic.
- Dark Dough: Repeat the process with the dark dough ingredients (including cocoa powder and molasses). Knead until smooth and elastic.

- First Rise: Put each ball of dough in a bowl that has a little oil and cover it. Let it sit in a warm spot for 1 to 1.5 hours, or until it gets twice as big.
- Divide & Shape: Punch down both doughs. Divide each into two equal pieces (four pieces total).
- Create Swirls: Roll out one light and one dark piece into 12×8 inch rectangles. Place dark dough on top of light dough. Roll tightly from the short end, like a jelly roll. Repeat with the remaining dough pieces.
- Combine & Twist: Place the two swirled logs side-by-side. Press them together gently. Twist the logs together, fold in half, and pinch the ends to form a loaf.

- Second Rise: Place the shaped bread on a baking sheet lined with parchment paper. Loosely cover it with either a cloth or plastic wrap. Allow it to proof for 45 to 60 minutes, and it should be nearly double in size.
- Preheat & Score: Preheat oven to 400°F (200°C) with a baking stone or empty cast-iron skillet inside. Make a few shallow cuts on the top of the loaf using a sharp knife.
- Bake: Place the baking sheet in the oven, Spritz the loaf with water. Bake for 35-45 minutes, until golden brown and hollow-sounding when tapped.
- Cool: Allow the item to cool completely on a wire rack before slicing.

Notes
Respect the Dough’s Needs (Gluten, Yeast, and Time): This bread’s success hinges on carefully balancing three key elements. First, gluten development requires proper kneading (whether by hand or machine) – don’t skimp on this, even though rye dough is stickier. Second, yeast activity is paramount; ensure your yeast is fresh, your water temperature is correct, and you see clear signs of activation (foaminess). Third, time is essential for both the bulk fermentation (first rise) and the proofing (second rise). Don’t rush these stages; let the dough double in size, even if it takes longer than the recipe states. Rushing any of these steps will almost certainly result in a dense, flat, or otherwise unsatisfactory loaf. Pay attention to the feel of the dough as much as the clock.
- Prep Time: 20 minutes
- Cook Time: 45 minutes
- Category: Appetizer, Breads, Breakfast, Snack American
- Cuisine: American

